With our telescope-Photos of stars and celestial bodies with students
by
Philippe Jeanjacquot
—
last modified
Jul 13, 2012 10:28 AM
For our courses and for other project we take photos with students of the Sun, planets deep sky objects, this item explains or method and shows our photos
In our School:
In our lycée Chaplin Becquerel, our students can follow two different courses in astronomy; the first is astro-philosophy lessons (2hours per week for the first level, the pupils have 15 years old). The second is a scientific workshop; it works like a kind of club. It is during their free time, a part on Wednesday afternoon, for preparing and analyzing the pictures of celestial bodies and on Friday evening for taking the pictures.
Our equipment:
We take the pictures with a Celestron C8 telescope, the camera is a Canon EOS 450D, we have also a DMK camera with red, blue and green filters, and we have a HEQ5 equatorial mount. We have got this equipment with the help of ASTRO à l’ECOLE. We have also a solar filter, and a tracking system for the long exposure pictures.
The C8 telescope with the HEQ5 mount, Canon EOS 450D camera and a tracking system
How we prepare an observation session:
Preparation:
The session before the observation, we select different celestial bodies. We try to make a list between 5 and 10 different deep space object or planets. They have to be more than 30 degrees up to the horizon, if it is not the case the pictures will be not we well contrasted, the atmosphere is too thick.
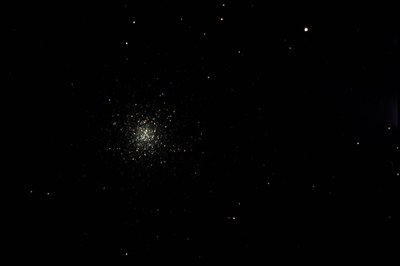
For example in 2009 we had a project about the globular clusters.

The observation session:
When we arrive on the astronomical spot in the country side or on a parking place without any light we set up the telescope and the camera, we use a laptop to drive the camera and another one to drive the tracking system (we do not use it every time, only when we want to make pictures with a long exposure time, more than 2min).
For the deep space objects, we use the 450D camera; usually we take 20 or 30 pictures of this object with 30 seconds exposure time with a sensitivity of 400 or 800 ISO.
For the planets we make a film with the DMK camera, one film with the blue filter, one with the red, one with the green and one with an infra-red filter for the luminance.

Calibration pictures:
With the 450D camera and the long time exposure we have to do pictures for calibrate the sensor. The pictures have to be taken during the observation session.
We make a flat field with a white box (picture on the left) or a white sheet(picture on the right). This is a clear grey picture with a homogeneous light. In this picture, the pixels have to be 2/3 filled. For example, we use a white sheet during the night after the observation session, then we make a picture of 30 seconds with the 450D camera on the telescope and we take another camera and during the 30 second make one flash on the white sheet.
 |
 |
 |
| White box method | Flat field image | White sheet method |
We make also a dark picture with the same opening time, for example 30s, and the same sensitivity, for example 400 ISO, than the deep sky object picture.

Dark image
We can do also an offset picture; it is a dark picture with a short exposure time for example 1/250s and the same sensitivity than the other pictures.
To have an average, we take 5 of each picture. We make the average with IRIS freeware.
For the planet, we do not need calibration pictures.
Working on the pictures:
For the deep sky pictures:
For this part, we use the freeware IRIS. After the observation session we have to stack the pictures. It adds the exposure time and increase the quality of the picture.
Before stacking we have to subtract the CCD sensor noise, it is made with the dark picture. So we subtract the dark image to each image.
We have also to divide each image by the flat field image. On the CCD sensor each pixel has not exactly the same sensitivity. To get a homogeneous picture we have to divide the image with the flat field image.
The flat field is very useful when we want to make measurements on the picture. If we want, for example, measure the magnitude of the stars.
The offset image has the same utility than the dark image. So we are not obliged to use it. But, if we follow the IRIS process, the software asks for the offset image.
Planets pictures:
For the planets we just stack them and add the three colors and the luminance with IRIS or Registax freewares.
Links:
Thanks:
Thanks to
 |
 |
Document Actions

